Centralized AWS Ingress with Transit Gateway - Part 2
In yesterday’s post, we built a centralized egress architecture using AWS Transit Gateway. Today, we’re completing the picture by implementing centralized ingress - handling inbound traffic from the internet to your spoke account resources through load balancers in your networking hub.
The Missing Piece: Inbound Traffic
While our Transit Gateway setup handles outbound traffic beautifully, we need to address how external users and services reach applications running in spoke accounts. The solution? Deploy load balancers in the networking VPC that can route traffic to spoke resources via Transit Gateway.
Architecture Overview
Our centralized ingress architecture extends the hub-and-spoke model with load balancers in the networking VPC that can reach spoke account resources:
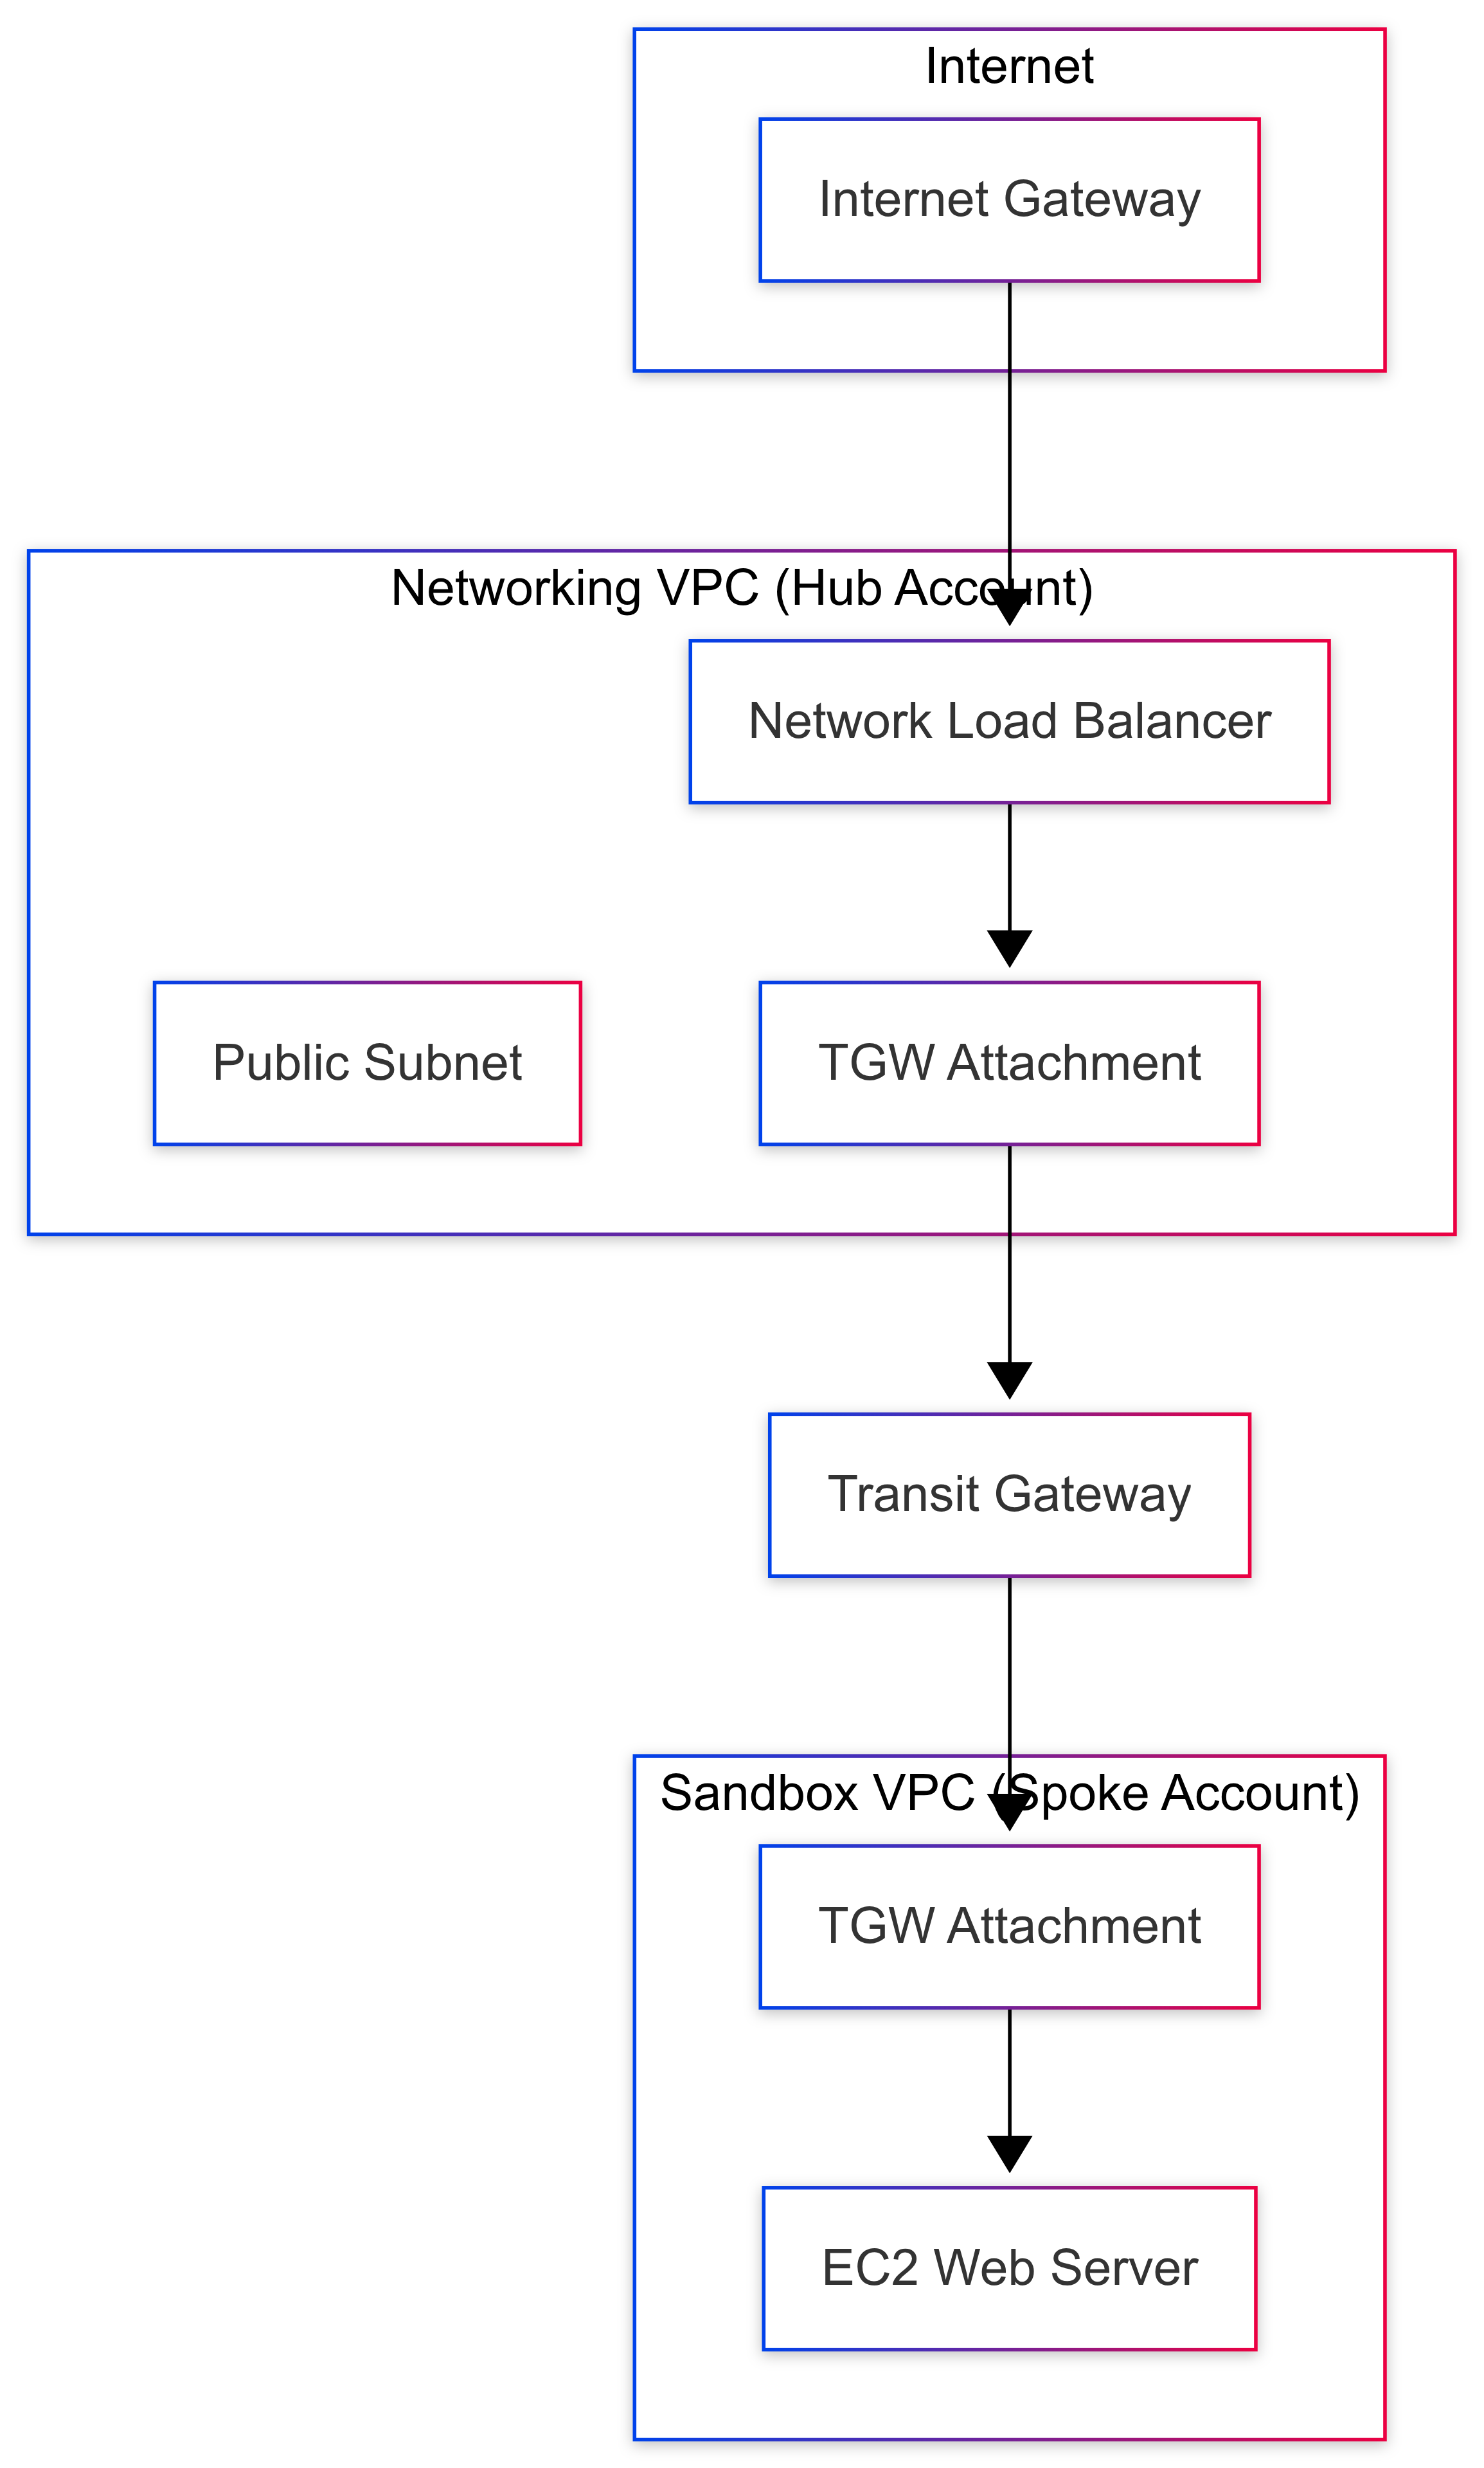 Figure 1: Centralized ingress architecture with load balancers routing to spoke resources
Ingress Options
| Load Balancer Type | Best For | Key Features |
|---|---|---|
| Application Load Balancer (ALB) | HTTP/HTTPS applications | Layer 7 routing, SSL termination, WAF integration |
| Network Load Balancer (NLB) | TCP/UDP, high performance | Layer 4 routing, ultra-low latency, static IPs |
| API Gateway + VPC Link | API management | Centralized auth, throttling, API versioning |
Implementation: Cross-Account NLB Setup
Let’s walk through implementing a Network Load Balancer in the networking account that routes traffic to an EC2 web server in a spoke account.
Prerequisites
- Completed centralized egress setup from Part 1
- Two AWS accounts: networking (hub) and sandbox (spoke)
- Transit Gateway shared and attached to both VPCs
Lab Architecture
Internet → IGW → NLB (Networking VPC) → TGW → EC2 Web Server (Spoke VPC)
The traffic flow:
- Internet traffic hits the NLB in networking VPC public subnet
- NLB forwards to target group containing spoke EC2 private IP
- Traffic routes through TGW attachment to spoke VPC
- EC2 responds back through the same path
Step-by-Step Implementation
Step 1: Launch EC2 Web Server in Spoke Account
Set up a test web server in your spoke account:
- Launch EC2 instance in spoke account private subnet
- Configure security group to allow HTTP traffic from networking VPC CIDR
- Install web server (Apache/Nginx) and create a simple test page
- Note the private IP address of the instance for target group registration
- Test local connectivity to ensure the web server is responding
Step 2: Create IP Target Group in Networking Account
Create a target group that can reference cross-account resources:
- Navigate to EC2 Load Balancers in the networking account
- Create target group with the following settings:
- Target type: IP addresses (required for cross-account)
- Protocol: TCP (for NLB) or HTTP (for ALB)
- Port: 80 (or your application port)
- VPC: Networking VPC
- Health check: TCP or HTTP based on your setup
- Configure health check settings with appropriate timeout and interval
Step 3: Register Spoke EC2 Private IP
Add the spoke account EC2 instance to the target group:
- Copy the private IP address from the spoke EC2 instance
- Go to target group targets tab in networking account
- Register targets and enter the spoke EC2 private IP
- Specify port (usually 80 for web servers)
- Save the registration and wait for health check initialization
Step 4: Create Network Load Balancer
Deploy the NLB in the networking account:
- Create load balancer in EC2 console
- Select Network Load Balancer type
- Choose internet-facing scheme
- Select networking VPC and public subnets across multiple AZs
- Configure listeners for the required ports (e.g., port 80)
- Attach the target group created in Step 2
- Add appropriate tags and create the load balancer
Step 5: Configure Security Groups
Set up proper security group rules for cross-account access:
- Spoke EC2 security group (in spoke account):
- Allow inbound TCP port 80 from networking VPC CIDR (10.0.0.0/16)
- Allow inbound health check traffic from NLB subnets
- NLB considerations:
- Network Load Balancers don’t use security groups
- Ensure target security groups allow traffic from NLB subnets
- Verify NACLs permit the required traffic flows
Required Routing Updates
Update Networking VPC Route Tables
The public subnet route table needs routes to spoke CIDRs:
# Add route to spoke CIDR via TGW attachment
aws ec2 create-route \
    --route-table-id rtb-xxxxxxxx \
    --destination-cidr-block 10.1.0.0/16 \
    --transit-gateway-id tgw-xxxxxxxx \
    --profile netw
Update Transit Gateway Route Tables
Ensure the Egress Route Table has spoke routes for return traffic:
# If not already propagated, add static route
aws ec2 create-transit-gateway-route \
    --destination-cidr-block 10.1.0.0/16 \
    --transit-gateway-route-table-id tgw-rtb-xxxxxxxx \
    --transit-gateway-attachment-id tgw-attach-spoke \
    --profile netw
Security Group Configuration
Spoke EC2 Security Group
Allow inbound HTTP from networking VPC CIDR:
aws ec2 authorize-security-group-ingress \
    --group-id sg-xxxxxxxx \
    --protocol tcp \
    --port 80 \
    --cidr 10.0.0.0/16 \
Traffic Flow Analysis
Inbound Request Flow
- Internet → IGW → NLB (networking VPC public subnet)
- NLB → TGW attachment → Transit Gateway
- TGW → spoke attachment → EC2 (spoke VPC private subnet)
Response Flow
- EC2 → spoke attachment → Transit Gateway
- TGW → networking attachment → NLB
- NLB → IGW → Internet
 Combined with previous’s egress setup, we now have a complete centralized networking solution that scales across multiple AWS accounts while maintaining security and cost efficiency.
Ready to centralize your ingress traffic? Start with a single service and expand from there!